
Last updated on

Managing PPC campaigns can consume a significant amount of time, especially when attention is diverted to less essential components, leading to account clutter or neglecting useful time-saving tools.
Utilizing these seven Google Ads shortcuts and functionalities can effectively reclaim valuable time for you.
Not only will these techniques aid in time management, but they will also expedite the acquisition of insights, thereby accelerating your path towards achieving superior results.
As accounts evolve or change hands over time, it becomes increasingly challenging to keep track of the keywords being bid on.
This situation is particularly prevalent when different account managers structure campaigns and ad groups according to their preferences. In such cases, searching for duplicate keywords across the entire account can be a laborious task.
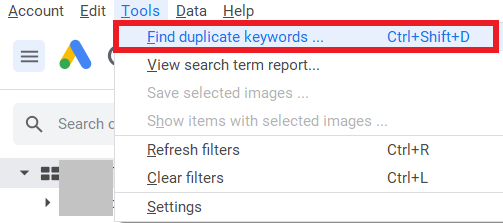
Fortunately, the Google Ads Editor offers a valuable feature to simplify this process. You can access it via the Tools option in the top menu.
The duplicate keywords tool provides various customization options, allowing you to define duplicate keywords with precision. For instance, you can choose between a strict word order or any word order, depending on your specific needs.
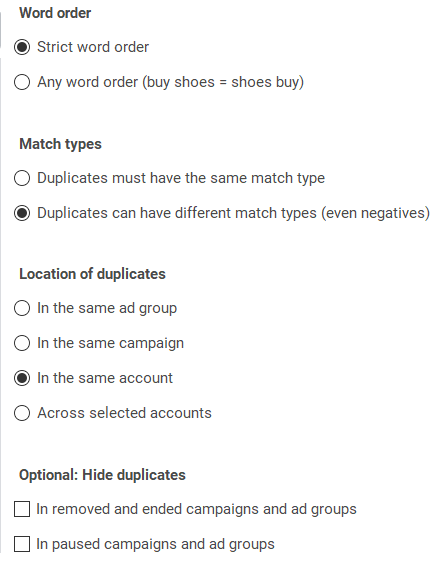
Opting for a strict word order is advisable when primarily concerned with Exact Match keywords. On the other hand, selecting any word order is effective for identifying and removing broad match searches or phrases that consist of the same words rearranged differently.
Another essential feature to consider is the Location of duplicates setting. You may want to limit the tool’s search to specific groups, especially if you have campaigns that intentionally duplicate content but target different devices or geographic regions. In such cases, checking for duplicates within each individual campaign is the most practical approach.
As we discuss keywords, let’s explore a feature that aids in the organization of negative keywords within an account.
Negative keyword lists provide an effective means of excluding specific keyword categories across multiple campaigns or the entire account.
Similar to the process of identifying duplicate keywords, going through all the negative keywords accumulated over time within a campaign or ad group can be a time-consuming task.
Negative keyword lists offer the ability to group particular keywords together into a list, which can then be applied to various campaigns.
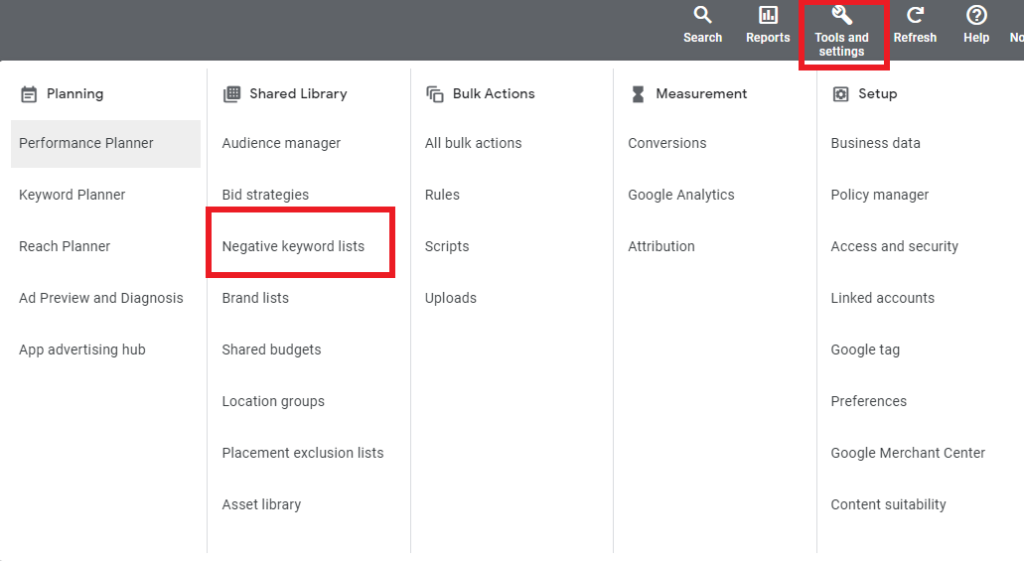
You can locate this feature within the Google Ads online interface by navigating to Tools and settings >> Shared Library >> Negative keyword lists.
For instance, you may already have an extensive list of irrelevant keywords that you prefer not to trigger in any campaign.
Establish an “Irrelevant Keywords” (or a name of your choosing) list and associate this keyword list with all the campaigns in the account.
Another example of how to make use of negative keyword lists is to differentiate Branded terms from Non-Branded terms.
Simply create a negative keyword list encompassing all Brand-related terms, searches, or phrases, and attach this list to all Non-Brand campaigns.
This ensures there is no overlap in performance between Brand and Non-Brand campaigns.
The Label feature in Google Ads is a powerful tool for account organization and time efficiency.
In my opinion, it’s one of the most underrated features within Google Ads.
While labels can be applied at the campaign, ad group, and keyword levels, their true potential shines when it comes to managing time-sensitive ad copy or conducting routine tests to enable or disable elements.
They are also incredibly beneficial if you wish to compare higher-level messaging or assess the results of copy tests before and after implementation.
You can assign a label to any ad copy by selecting the checkbox next to the desired ad copy versions and then choosing the “Label” option from the blue toolbar that appears.
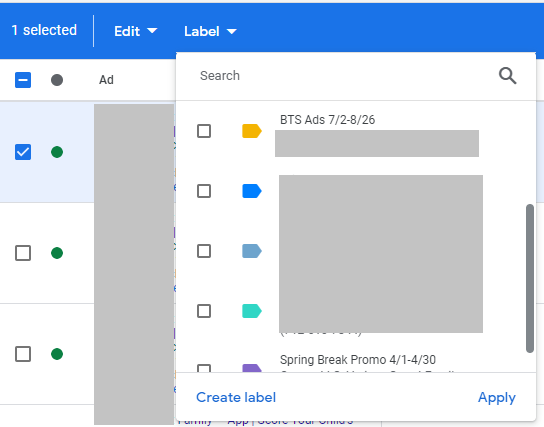
You can then select the labels you wish to assign to these ads or create a new label if needed.
In this example, the aim is to facilitate the testing of a new message related to a specific website promotion. Without labels, comparing different ad types can be quite cumbersome.
Labeling each ad streamlines this process.
Next, navigate to Reports > Pre-defined Reports and opt for the Labels option.
You can then view the label groups and apply the desired metrics for analysis.
Another useful application of labels with ads is for scheduling purposes.
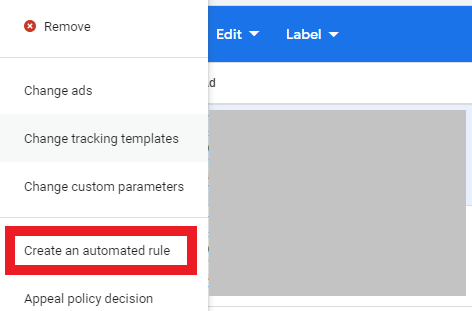
After labeling the ads as explained earlier, choose the ones you want to activate at a specific date and time. Check the boxes next to these ads and then access the blue toolbar, clicking on “Edit.”
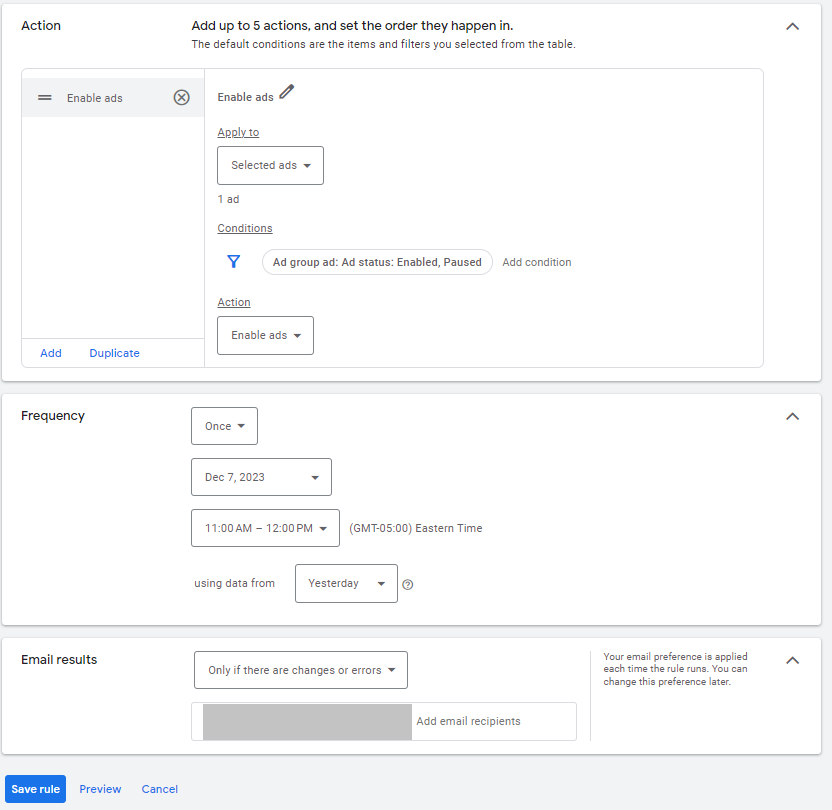
From this point, you can establish rules for all the selected ads, incorporating various timing and condition parameters.
You would repeat this step each time you wish to deactivate or reactivate something.
When it comes to simplifying the process of creating and testing ads, another useful method is utilizing the Experiments feature.
You can access this feature within the Experiments section, which is situated on the toolbar located just to the left of your primary window.
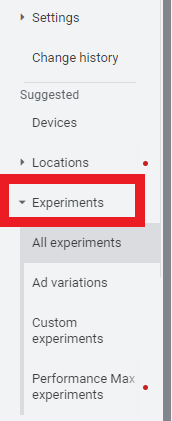
Navigate to the “All experiments” section and then click on the blue “plus” (+) button to commence the creation of your own customized experiment.
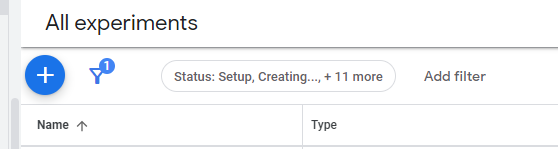
From there, you will have the opportunity to select from various options:
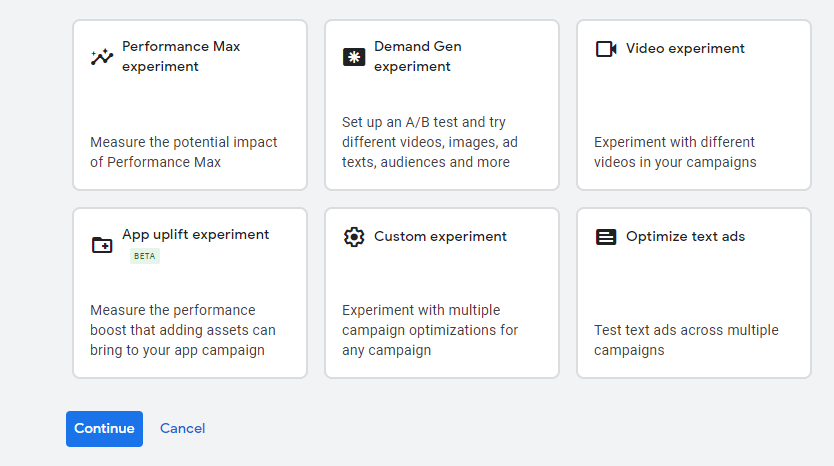
One notable aspect of this option is the ability to establish the audience split percentage according to your preferences. This enables you to impose a 50/50 split, whereas in standard ad testing, Google automatically optimizes the distribution.
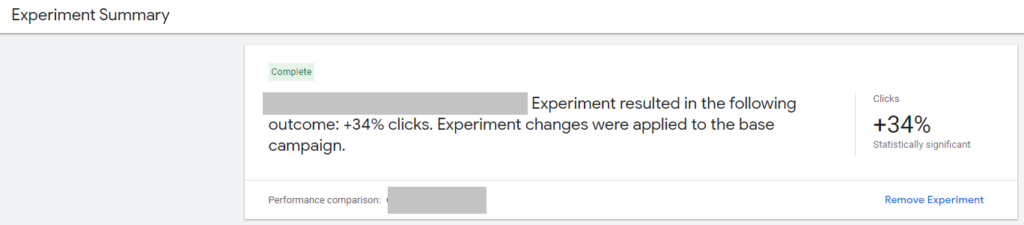
Another advantageous feature of experiments is its simplicity in identifying a clear winner. As demonstrated in the example above, one of the conducted experiments displayed a statistically significant change in click-through rates. This made it an effortless decision to apply the experiment to the original campaign, resulting in improved performance.
Maintaining a comprehensive account history within Google Ads can pose a challenge. The platform involves numerous dynamic components, external factors that impact outcomes, and various individuals managing the account over its lifetime.
This complexity can lead to difficulties when attempting to assess performance.
For instance, while reviewing year-over-year data, you might observe that the previous year’s performance was significantly better. The reasons behind this disparity can be diverse.
It could be attributed to certain holidays falling on different dates each year.
Alternatively, the brand may have received a substantial boost in public relations, leading to increased attention and search activity.
The use of Annotations can be immensely beneficial in documenting this external account history and can save a considerable amount of time that would otherwise be spent piecing together such analyses.
How can you add Annotations?
To begin, click on the performance graph within the Campaign or Ad Group view.
As you hover over the graph line, you’ll see the date and performance metrics displayed, along with a blue “Add Note” option. You can input your note there.
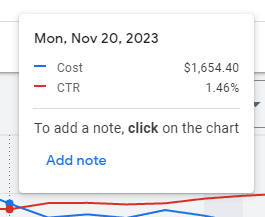
Once you have added notes to the account, they will appear as small squares along the timeline of the graph.

Clicking on these squares will reveal the notes that were left and the dates on which they were created.
A frequently overlooked but crucial feature is the capability to include audiences in your campaigns.
Why is this significant?
It’s common knowledge that Google is continuously striving to better understand a user’s search intent and context, not just limited to displaying ads for exact keyword matches.
What was previously reserved for upper-funnel campaigns like Display and YouTube audiences can now be integrated into Search campaigns as well.
However, before making sweeping changes and targeting specific audience segments, it’s advisable to introduce various audience signals in “Observation Mode” within your campaigns.
This approach enables Google to collect data on how these audience segments perform within a campaign in comparison to those who are not part of these specific audience segments.
If you’re in the data-gathering phase, this is a logical step to efficiently gain insights into who is engaging with your advertisements.
Audiences can be incorporated at either the campaign or ad group level.
When you’re within the designated campaign or ad group, navigate to the “Audiences” option on the left-hand menu.

After accessing this section, you’ll encounter a chart featuring a blue button labeled “Edit audience segments.”
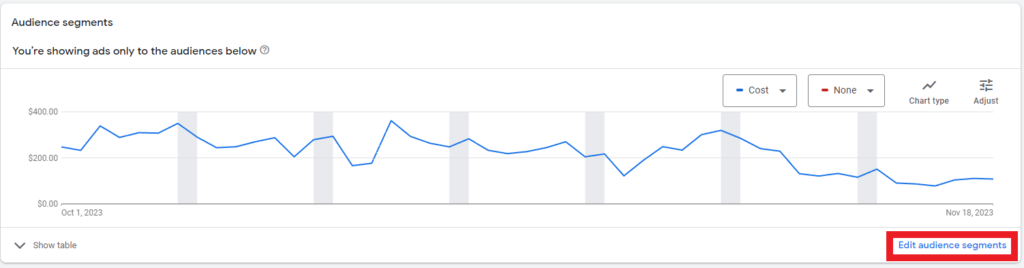
You will have a wide range of options to select from, such as:
Choose the audience segments that align with your campaign objectives, and then add them under “Observation” to ensure that you do not restrict your targeting too hastily.

To assess the performance of these audience segments, return to the Audiences tab, where you can expand the table.
Google furnishes a breakdown of essential metrics, including conversion metrics, allowing you to easily gauge how much more (or less) likely these audience segments are to make a purchase in comparison to users who do not belong to those specific audience categories.
When the timing is appropriate, based on the data you collect, you can transition from “Observation” to “targeting only” for a particular niche audience.
Finally, don’t overlook the Insights and Recommendations tabs within Google Ads.
I’ve discovered that these tabs can be incredibly beneficial in saving time and pinpointing significant fluctuations in performance on a weekly or monthly basis.
We all lead busy lives, and it’s effortless to overlook overarching insights when we’re deeply engrossed in managing our accounts day in and day out.
The Insights tab, accessible from the left-hand menu, offers valuable insights spanning from the entire account down to individual campaign levels.
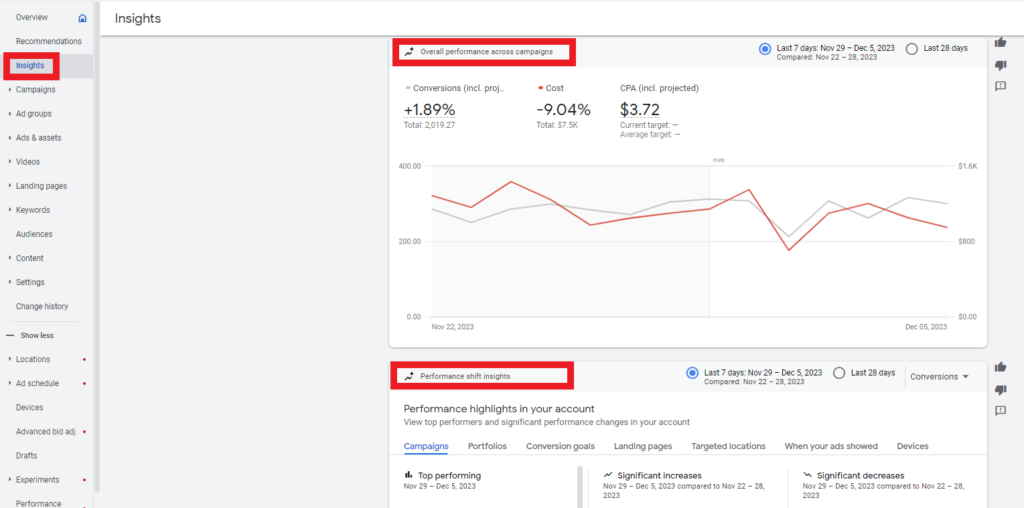
It also delves deeper into various aspects of a campaign, including search term insights and audience insights.
Having a clear understanding of where to allocate my time and efforts based on these insights saves a significant amount of time, allowing me to focus on analyzing issues and devising solutions.
The Recommendations tab can also be located on the left-hand menu and offers a wide array of suggestions for your account.
Here, you’ll also find the “Optimization Score” for your account, and implementing or disregarding recommendations directly affects this score.
I advise against blindly accepting all of Google’s recommendations solely to boost the Optimization Score.
Instead, this tab serves as a valuable resource for account managers to evaluate the context of their accounts and selectively apply recommendations that align with their specific needs and objectives.
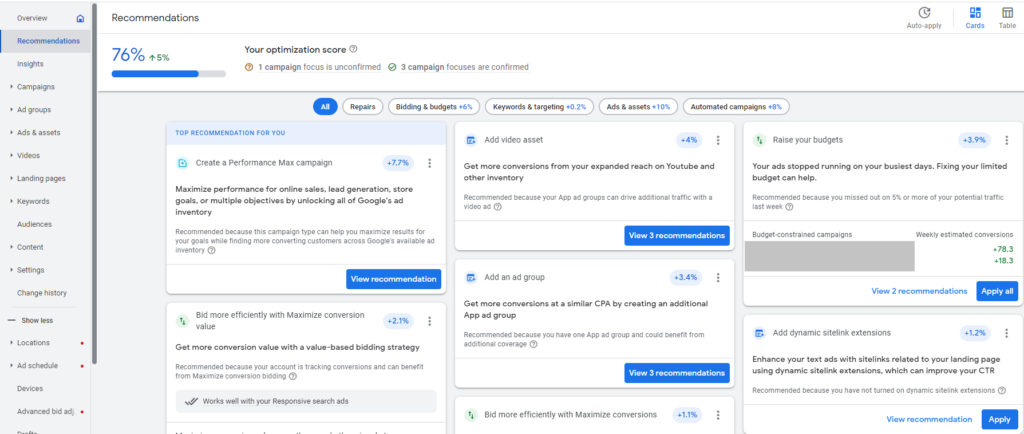
These recommendations are typically categorized into:
For instance, one of these recommendations might propose the removal of redundant keywords to streamline account management. This suggestion becomes particularly relevant as match types become more flexible, and Google can execute this optimization automatically.
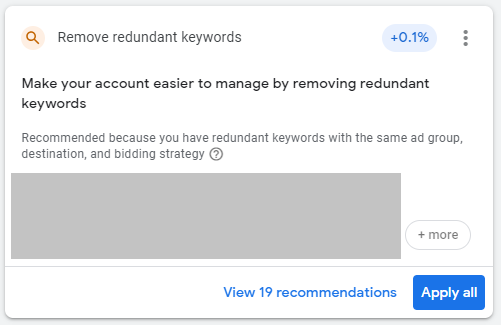
This allows me to dedicate more time to strategizing and analyzing the account, rather than engaging in routine tasks like manually reviewing each keyword to determine which ones to pause.
A recurring theme among these recommendations is the importance of automation.
Google Ads is a complex platform that can consume a significant amount of time.
Administrative tasks often take up valuable time that could be better utilized for strategic planning and making high-level PPC decisions.
Leverage the automation tools provided by Google.
Experiment with automated bidding, carefully assess the insights and recommendations it offers, and invest upfront time in creating assets that will simplify ongoing account management. This approach will lead to more efficient and effective campaign management.
Original news from SearchEngineLand